In the last post there were a few things I wanted to follow up on with my exploration into Nanite Tessellation!
I also found the video that I meant to watch last time with Brian Karis breaking down all sorts of great things about the tech, and he touches on all the things I mentioned in the last post and more, so definitely go watch that for much cleverer insight!!
Timestamp is near the start of the Nanite Tessellation discussion, but whole video is worth watching:
Also, just after I finished the first blog post this great video talking through all sorts of Nanite things came out!
That video covers a lot of the ground of these posts also, but demonstrates them really clearly, highly recommend watching it.
Seams issues
In the last post I figured you could fix Nanite Tessellation splitting at UV seams by blending them down with vertex colours at the seam, etc!
Instead of vertex colours though, I settled on using a texture instead, wasn’t sure what sort of impact having vertex colours would have on Nanite’s clustering (when clusters LOD they have to try and maintain vertex colours, I just figured textures might be the best place to start).
To start with, I generated a new mesh for a bit of fun. Since I am now working with much lower poly meshes than before, most of the process of generation in Houdini is pretty quick, so I roughed out a new shape:

And then applied the similar noises as for the last rock, with a few tweaks:

I won’t go too much into the technique here, because I think you’ll find a lot better tutorials on rock generation in Houdini out there, but my approach is mostly informed by this great training session by Rohan Dalvi:
https://www.rohandalvi.net/vdb
Tweaking the mesh and noise didn’t take too long (a few hours and hopefully reusable on other assets).
But I pushed the noise far to far with this asset and ended up with a lot of deep tunnels and cracks. It’s a bit hard to show exactly how bad it is, but if I take the camera inside the mesh you can see a problem area, which I have dozens of:

So this asset can act as an example of what not to do, because a big part of the point of me pushing Nanite Tessellation was to make unwrapping easier, and it took me probably 15 hours to select all the seams in this 😛
Cleaning up the VDB before meshing, and many other things would improve this, so I will probably come back to it.
I could also lean more into triplanar mapping in Unreal, but I don’t love relying on it, it likely gets a bit expensive when you end up with dozens of texture samples (have not profiled it recently mind you)…
So, nightmare seam selection for unwrapping:

Spending a little more time on the seams is the best way I’ve found to try to avoid issues with UV layout, so I tend to end up with far more cuts than desirable, and then merge UV sheets again afterwards, otherwise you end up with a lot of overlaps and issues.
Since I already have that edge group for the seams, I can group promote it to points, and use it as an attribute for an Attribute Fill in Diffusion mode to make a mask for where the seams are:


The Labs Map baker in “Copy Lowpoly” mode can just bake that out as a texture.
Be warned: I have found it pretty unstable, crashes 2/3 times, so make sure you save your scene and have autobackups enabled if using the Labs Baker!
Back in Unreal, I import that seams mask:

I’ll eventually pack it with other things, for now it is a lonely 1024*1024 DXT1 “Masks” type texture.
Could also give vertex data a try, but like I mentioned earlier I’m not entirely sure how much that messes with Nanite clustering.
In the material I have a switch parameter that lets me preview this mask:

And then a min and max param so I can choose how far from the seams to blend down the displacement.
At the moment I am going quite wide with this to make sure I’m not getting displacement cracks. This is maybe necessary because my unwrap is still pretty bad, or my material needs a bit more work, but it does a good enough job for me for now!
Nothing too fancy in the material, just using the min and max in the input to a RemapValueRange (and since it is 0-1 output I could simplify that, but remap is nice and contained).

Enter Sandstone
For the time being, all detail in the material is generated from one macro mask, and three tiling normal and displacement maps.
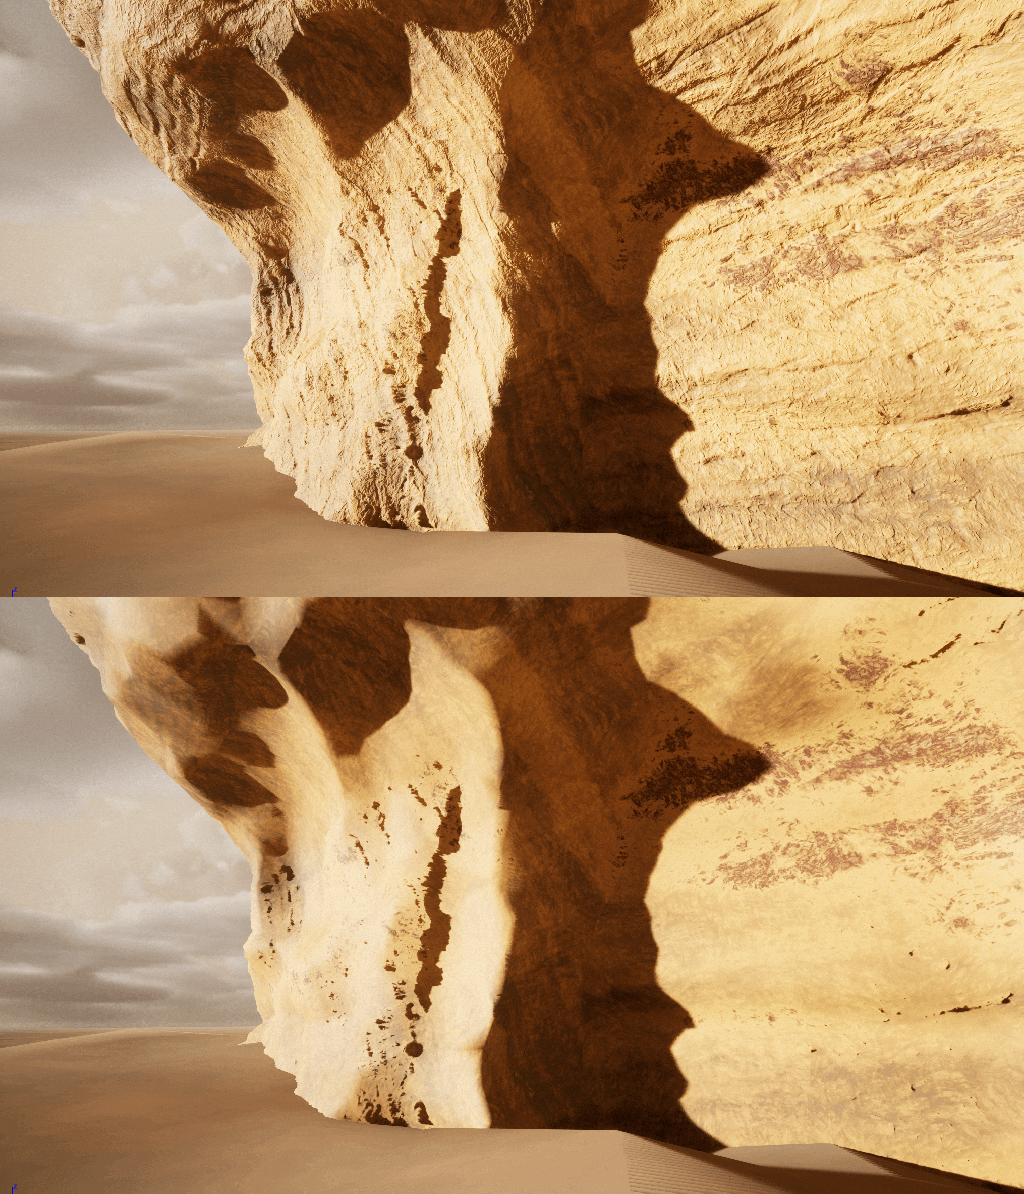
I mentioned last time that having normal maps paired with displacement maps is unfortunately necessary because Nanite Tessellation doesn’t adjust the normals in any way.
So if it is not in a direct light, not adding to the silhouette, and you aren’t close enough to get much out of Lumen, you won’t get much at all out of Nanite Tessellation.
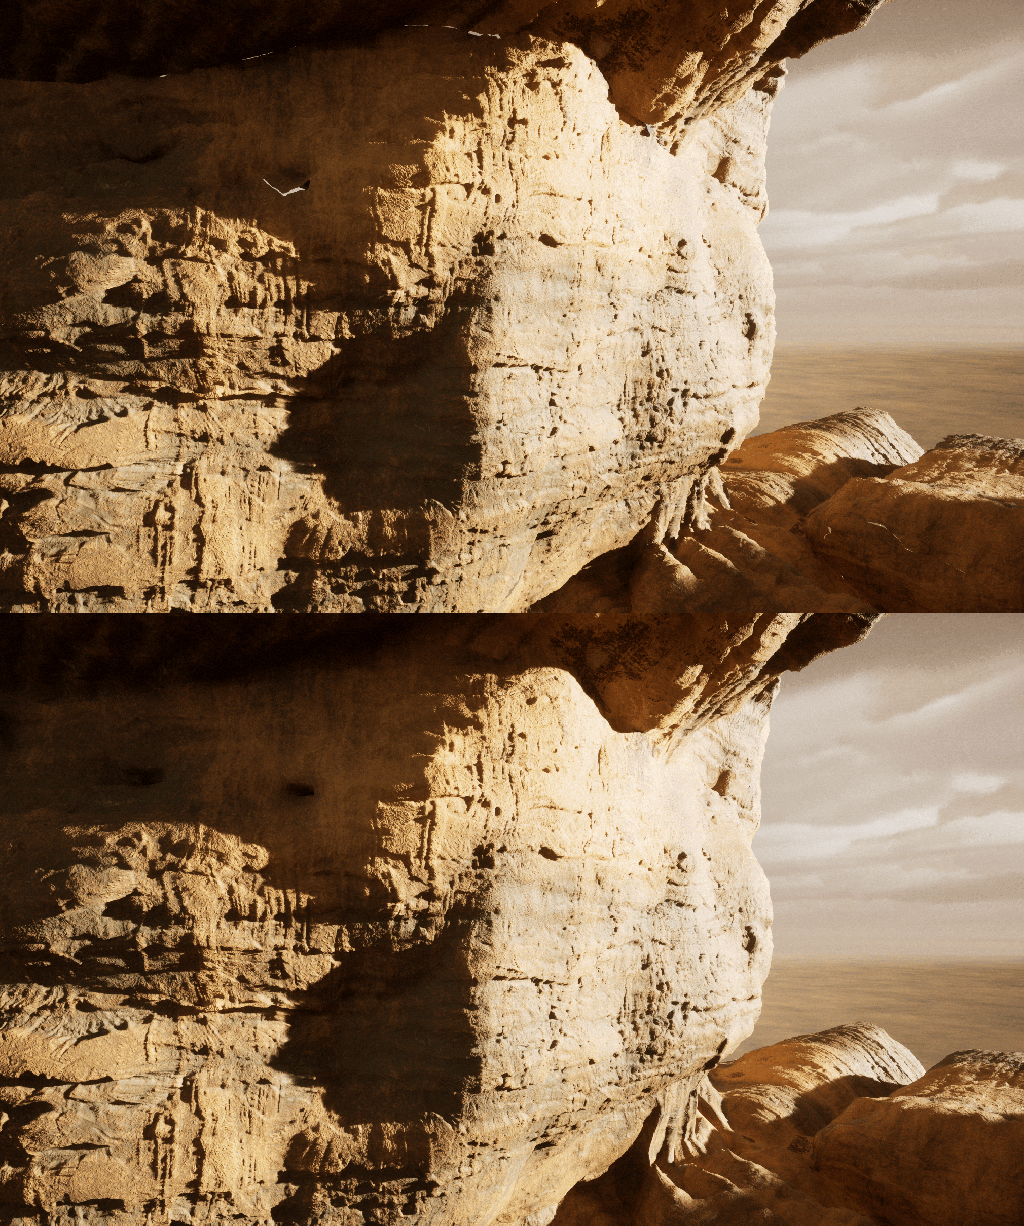
And that is a bit easier to show by enabling and disabling the normals:
I did attempt to see if I could do a ddx/ddy hacky normal generation in the material (sampling scene depth, not on the height textures I’ve generated), but for some reason couldn’t get that to work!
Might be beyond my skills, but I’d love to work out something for that in shader code instead of gross material or post process hacks.
In the long run, it would be nice to not need normals and just have heightmaps, because heightmaps are just so much simpler to work with inside materials. But for now I’d recommend just always using both together.
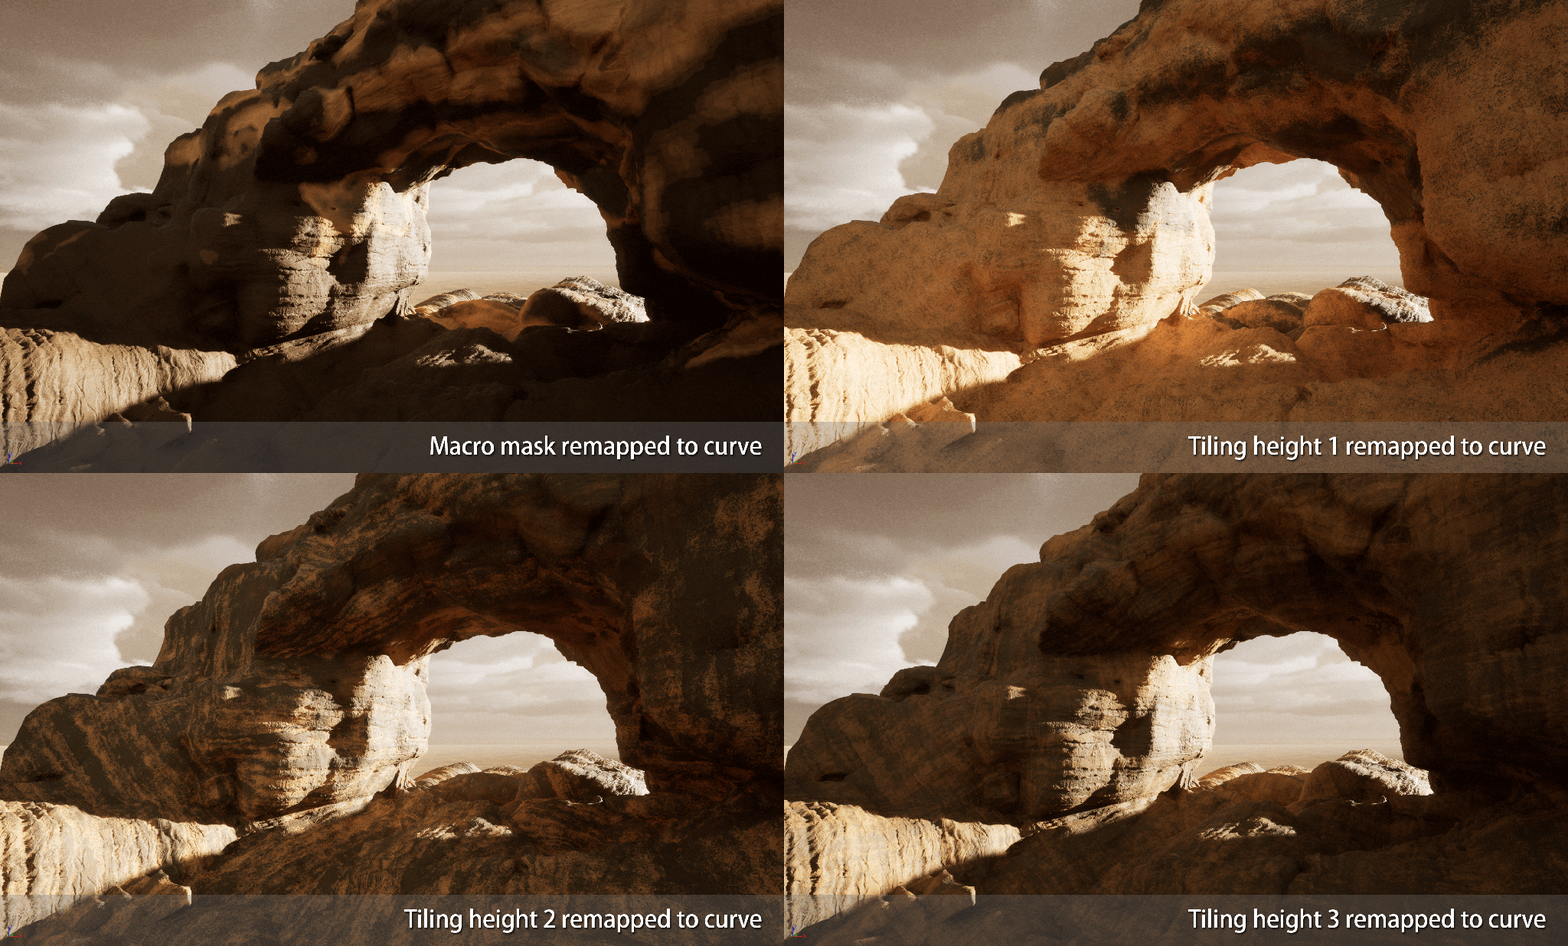
These are the three tiling height maps:

The only one I like at the moment is the middle one, so I will be remaking these!
The one on the right is particularly bad. But they were an ok starting point for setting up blending the 3 tiling textures.
I’ve always been a fan of driving albedo values with ramps, for example painting flames in Photoshop using Gradient Maps back in the day:

The rock material currently works in a similar way!
It maps the greyscale heights of the tiling maps to a Curve in Unreal. To start with I sampled colours from a sandstone megascans asset that I left in my scene for a point of comparison, but and some point I accidentally deleted the base Megascans material, so now they are broken forever I guess 😛
Anyway, the curve looks like this:

I have a base Macro mask baked out of Houdini with some noise and AO driving it, it is a combination of regular AO and Peaks using the Labs Ambient Occlusion nodes:
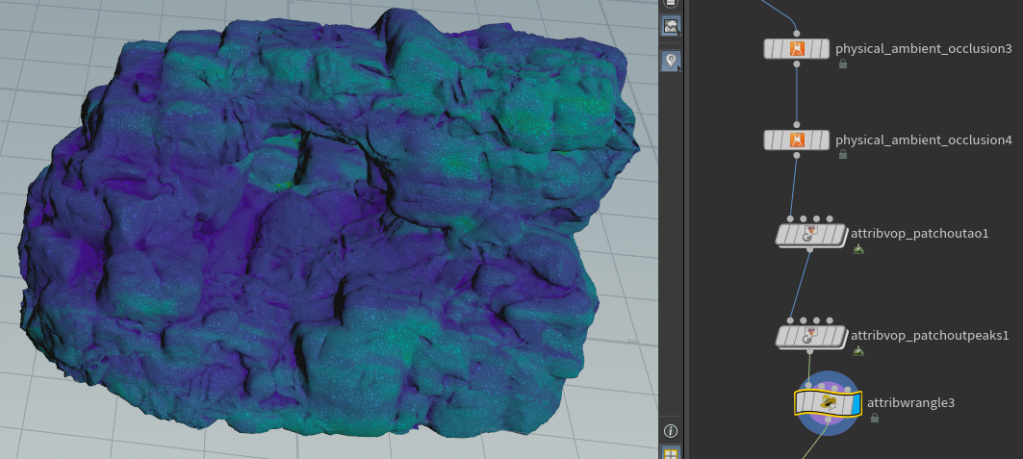
The VOPs there are used to multiply some noise through the Peaks and AO, and then I’m combining them in attribwrangle3 that I was too lazy to rename…
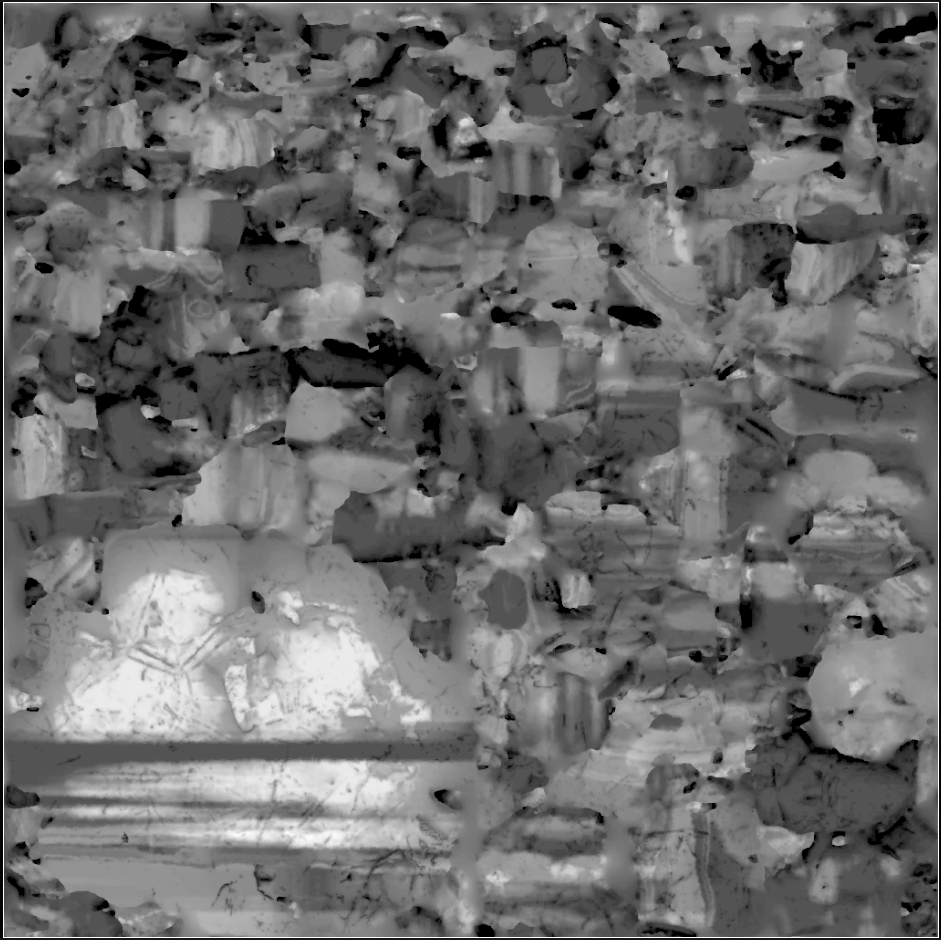
The mask for the arch ends up looking like this:
For each new rock I find some balance of the Macro + Detail1,2 & 3 heights and then use that value to look up the colour in the colour curve:
All the detail maps have been packed into a float4 off this screenshot, so that is what is getting multiplied against the “Detail Height Colour Contribution” then I combine that with the Macro mask:

I’ll probably add in a full colour albedo texture to overlay with this just to give myself a bit more control, or perhaps a seperate macro mask driving a different curve just to get a bit more variation, but I am happy with where they are at for the moment!

I might also need something for better up close albedo!
But I also plan to make smaller rocks to scatter, maybe some vegetation, and other layers to combine with this, so we’ll see how much of any of that I need.
The rocks are also a uniform roughness, I might be able to get reasonable results also using the tiling heights –> curve –> roughness, but it may just be more sensible to bake out tiling roughness maps with the other tiling details.
Wrapping up
I’d still like there to be some sort of built in seam fixing along the lines of what I’ve done in the material (some sort of blending of displacement to a fixed or average value at a seam).
If it could be an average of the displacement of the two vertices on the seam, then it would already look nicer than blending verts either side of a seam down to 0, or some constant value. This would be particularly true if you are animating displacement on the mesh I think.
And baking out “seams” textures are prone to issues with wrong texture settings, will cause seams to pop in and out of existance with camera changes, etc, or any situation where texture streaming or virtual textures don’t get the right mip at the right time. You could force off mips for that texture, but that’s a great way to make the material really expensive since every time you sample it per pixel you’ll be caching the whole texture I believe. All in all it feels like a bug generator.
I will try vertex colours eventually, and compare the Nanite Clustering with and without.
I am getting happy with some of the details in these now, so hopefully I can just tidy them up, do a bit more work on seams and materials, and move on!


As a side note, and I could go into it in future posts, I’m generating the skydome out of Houdini 20 using some of the new skybox tools!

The render times are rather ridiculous though, so it’s at least half the resolution I would like, and twice as much noise as I would like, but it’ll do for now until I find a better workflow (if I render it out at 8k x 4k it will take about 60 hours, so it is currently 4k x 2k).
Building skydomes out of a bunch of overlapping card elements that can be higher quality, animated, etc, is probably a better way to go, and I’ve wanted to try that out for a while but… Very lazy.
Also thinking of using Embergen for that since it is blazingly fast!! I plan to use it for other effects in the scene eventually, just taking me a while to get to it.
So that’s about it for Nanite Tessellation, but hopefully I will have more to show in this scene in the future!
Amusingly this scene was supposed to be testing out PCG, then I got sidetracked testing out Substrate, and then Nanite Tessellation, so maybe next post will be related to the thing I was *supposed* to be doing here 🙂